
How to create proxies FAST using Blackmagic Proxy Generator
DaVinci Resolve 18 came with a whole bunch of upgrades but one of the most useful tools is the Proxy Generator.
A proxy is a small, compressed version of your main footage that allows your computer to process footage easier and makes editing faster.
DaVinci’s new Proxy Generator is a separate application that comes with your DaVinci download - which means you’re able to edit in DaVinci Resolve while generating your proxies.
How to use Blackmagic Proxy Generator
Open Blackmagic Proxy Generator and allow it to access your files.
Choose the clips you want to make proxies of and click “Open.”
Choosing your Proxy Format
There are four different options for Proxy Format

It’s very important that you know the resolution and metadata of your footage. This will be a big factor for color grading.
For example, if you shot in 10 bit and you’re making proxies in 8 bit, you’re going to run into problems with color banding, so check your footage before to see what was shot.
Once you’ve chosen your format, click Start. It will take a few minutes, especially if your footage is shot in a high resolution.
As a note, this can be happening in the background while you’re working in DaVinci Resolve.
Bringing footage into Resolve
Once the Proxy Generator is finished, you will see a Proxy folder alongside your original footage.
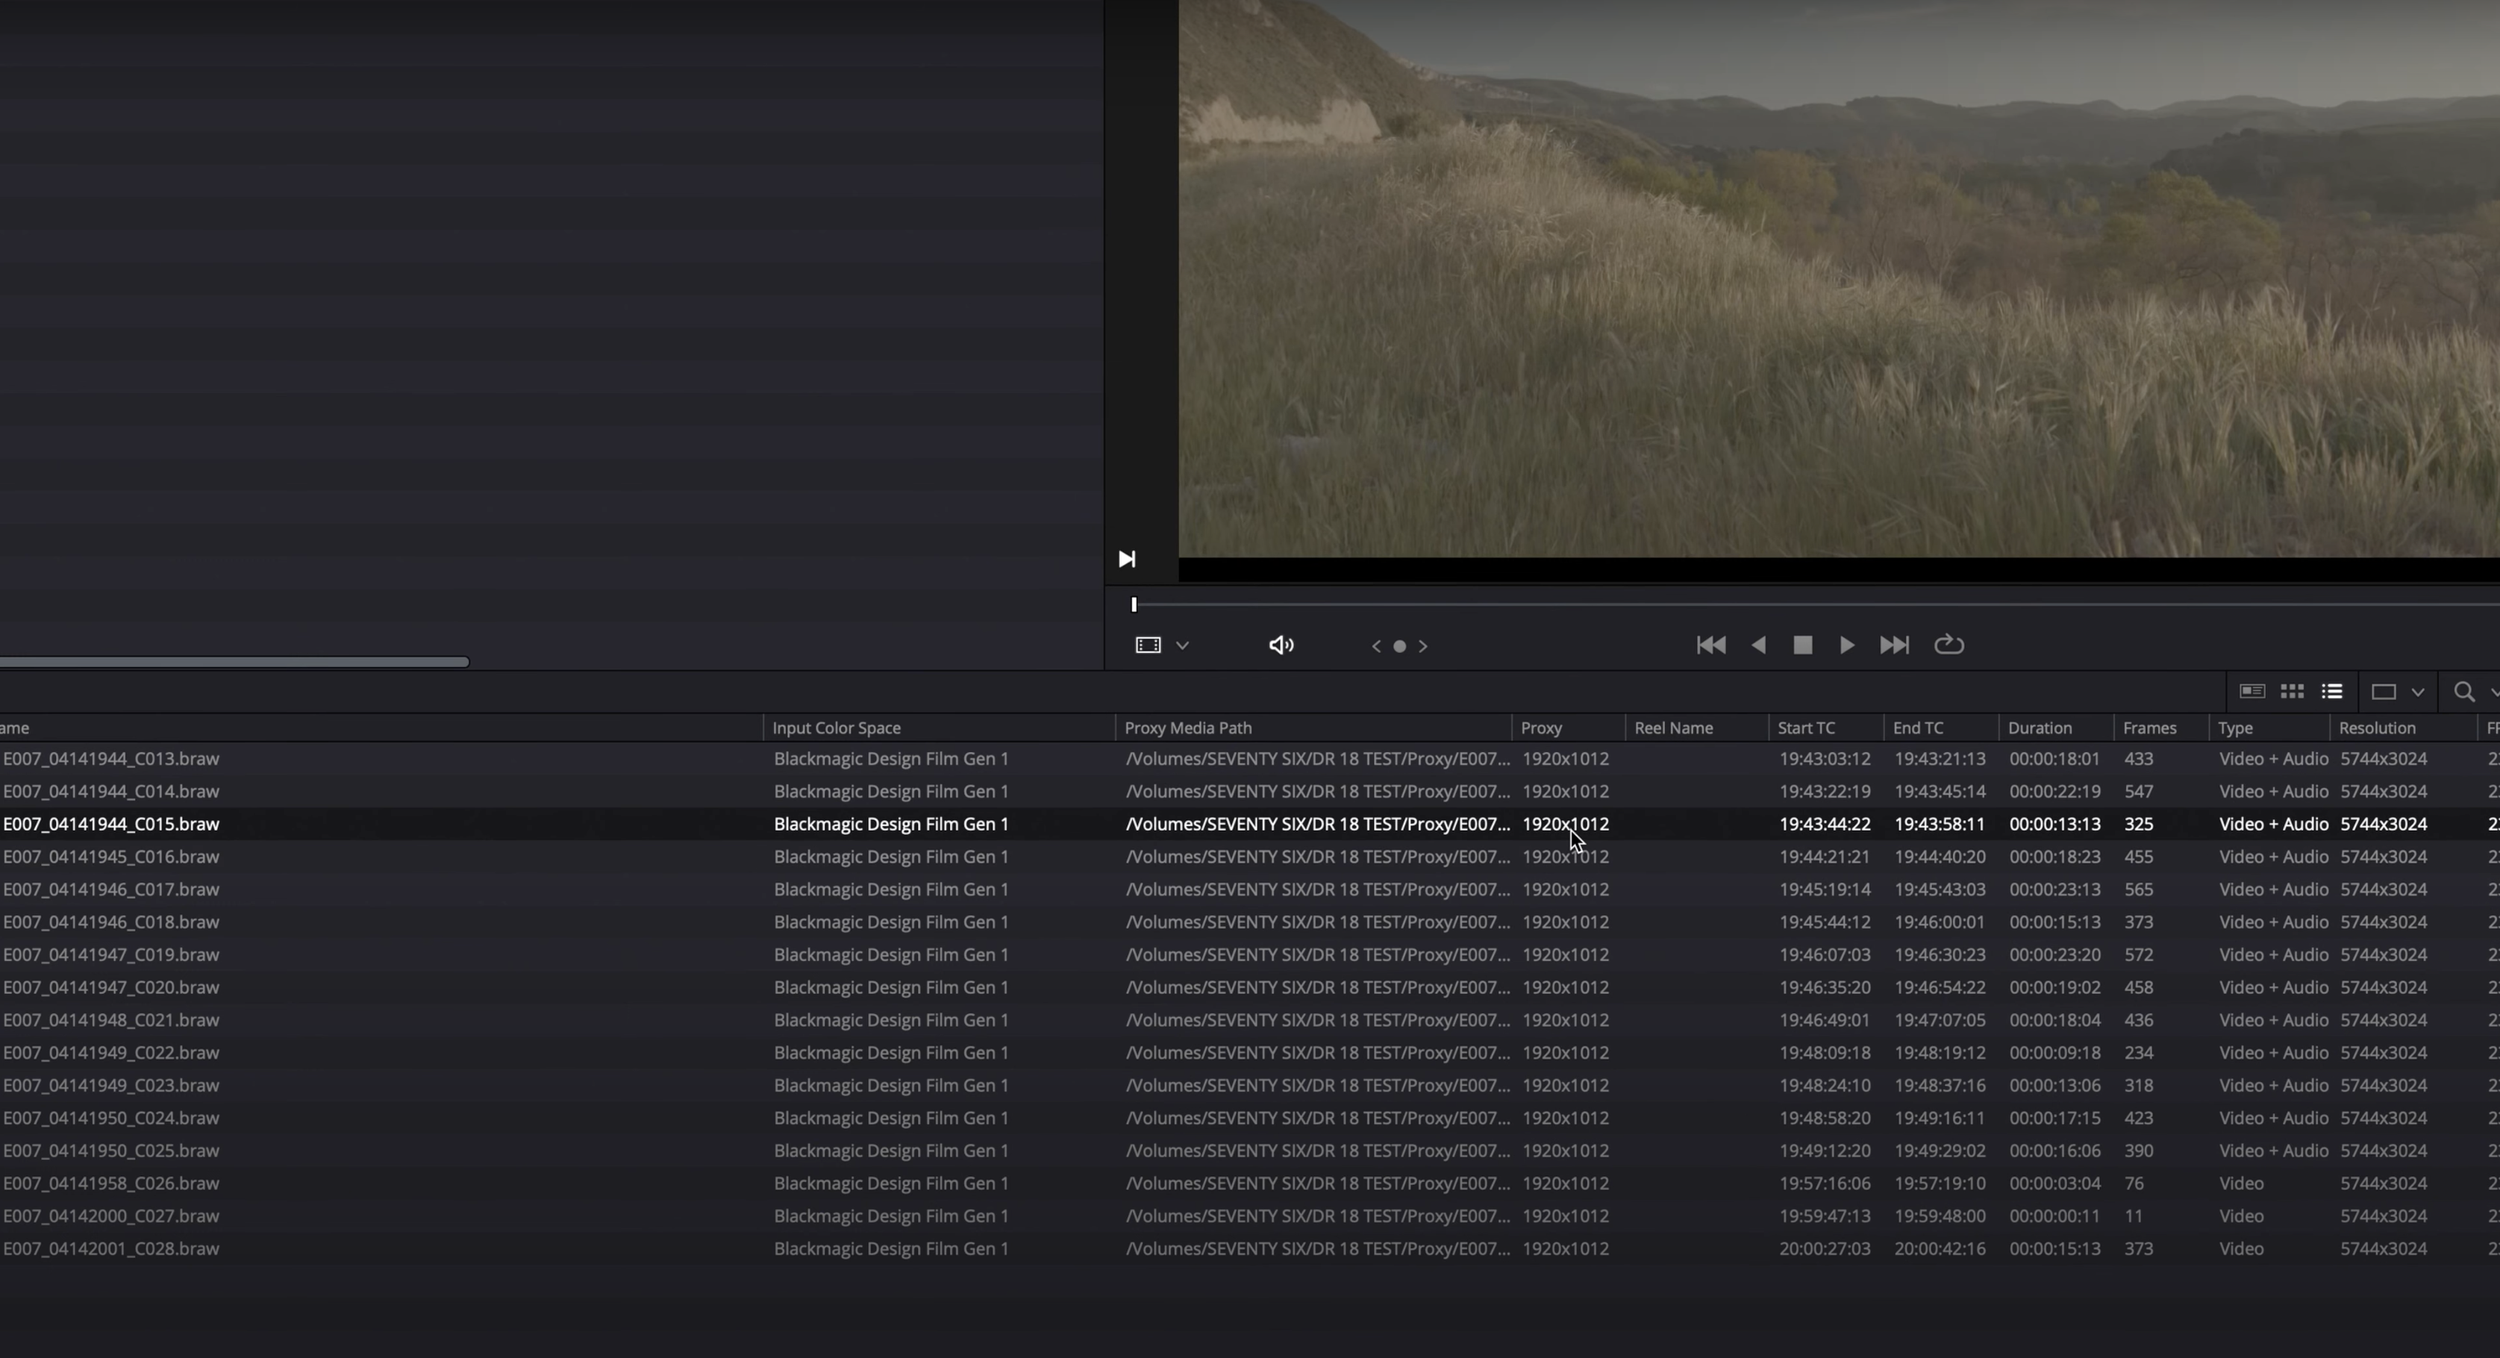
When you bring your footage into Resolve, you can see it has proxies attached to it in Media Pool.
Make sure you have “Proxy” and “Proxy Media Path” checked in your settings.

You will then see the proxies you’ve created and the folders they’re in.
Using proxies in DaVinci Resolve
Under “Playback,” click “Proxy Handling” and “Prefer Proxies,”

This will help speed up your workflow while you’re editing.
You might even be able to get away with it while you’re coloring, but if you’re trying to do something specific with one area of footage, switch back to “Prefer Camera Originals.”